Concept Case (Unofficial)
-
Sure, please go ahead.
I modified the design of the actual case part to be a bit easier to print and fit together.
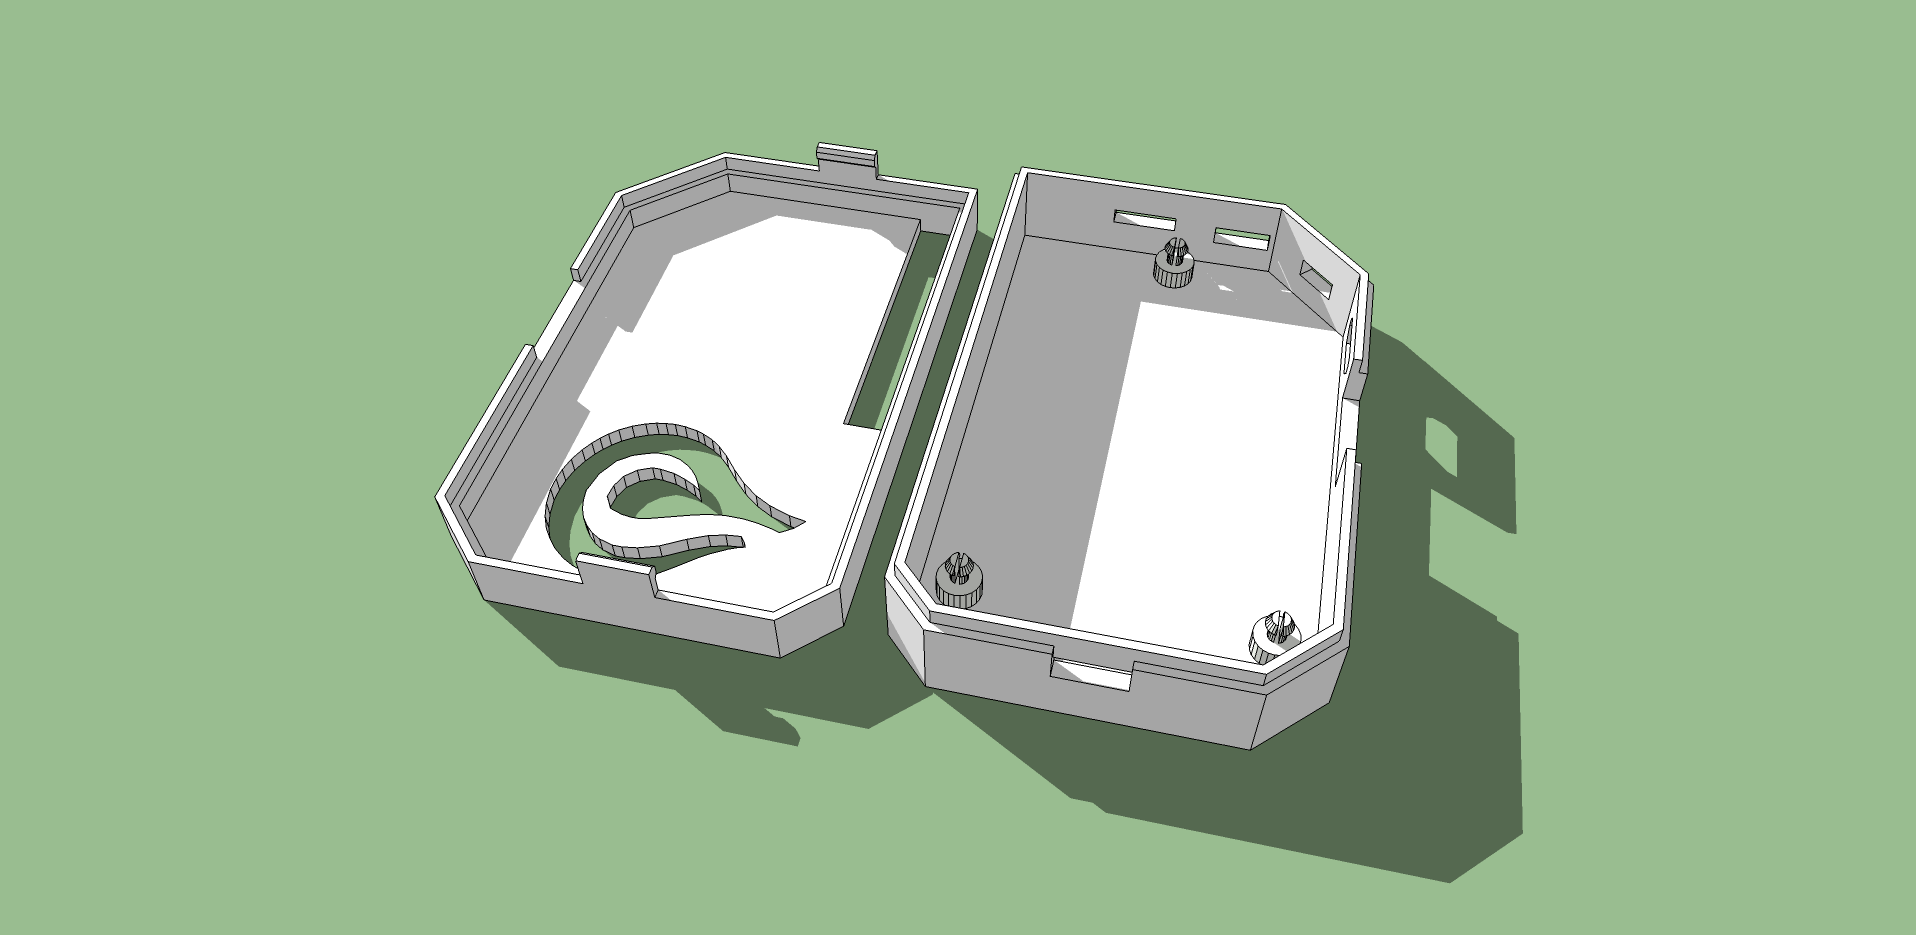
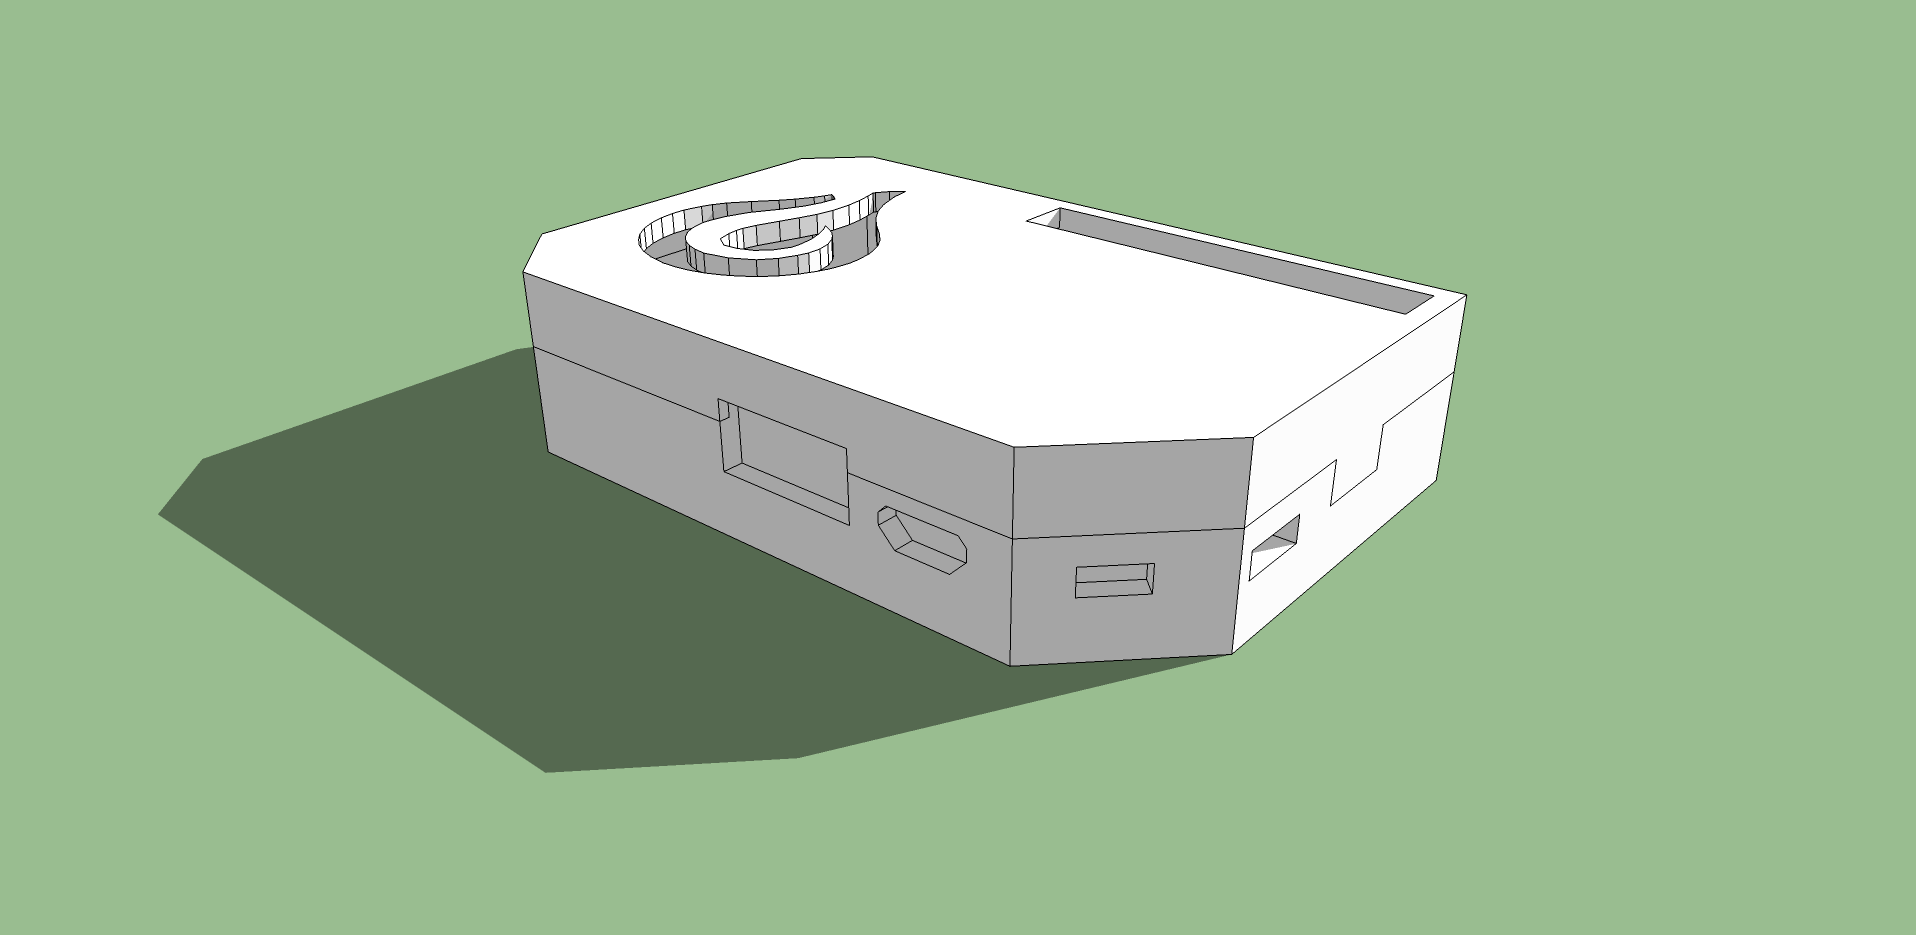
The test print seems to work quite well but there are a few issues and improvements:
- On off switch and reset switch are to recessed to be used.
- The Expansion board part is a bit loose. Should be cut-out/recessed to provide a tighter connection
- The corners on the lip of the bottom part made it hard to get the top of the case on, chamfering the corners allowed the top section to snap on.
- The clasps on the side to keep the top and bottom together broke off immediately. These are really not required.
- The board holder standoffs also broke off. Will probably change these to screw holes.
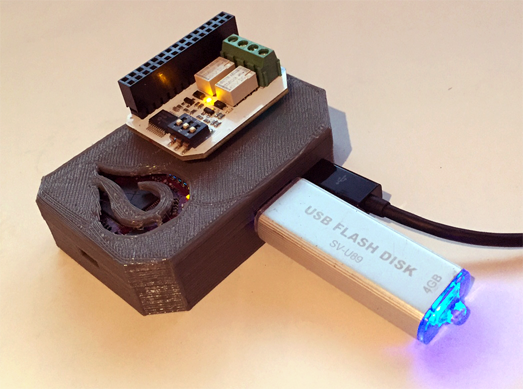
Otherwise good, here is the test print with working omega in dock with a relay board added on top.
-
@Al Wow, the real thing turned out even nicer than the design!
")
-
@Boken-Lin well, its a bit hairy but it seems to work!
-
Anyone know where I can send the design for a 3rd party to print it out for me and ship to my place?
-
Looks really good. I'd buy one for sure.

Two suggestions: 1) might be a good idea to add a vent port on the side for added air flow; 2) maybe even figure out how to add a small fan.
-
I've wondered about a laser cut piece of acrylic. I kind of like the protector that Adafruit sells : https://www.adafruit.com/products/2292
I bought one for a Pi, it's nice.
-
@SDuquet do you think it would really be necessary to add a fan? The CPU gets warm, but not to a point where cooling is needed.
-
Hey, just some minor heads ups from a fellow FDM printerator.
-
Yeah the little claspy snappy things don't work very well when printed in this orientation. If you want to do those, it's best to print them on their side, as a separate thing to snap in.
-
Same thing on the clippy snappy tabs on the side of the box - like you said, probably not needed, but if you want to do something like that, create a recess and make it a separate part, and print the part flat, then glue it into the recess with some acetone, and the flex goes along the "grain" of the print layers, so it doesn't just snap itself off.
Really neat little case, thanks for tossing it together!
What kinda printer do you have? I've got a Bukobot V2 Duo from Deezmaker. I might try this in my glow filament that's on its way.

-
-
@Enrico-Bermudez You probably have local company that does printing. My town have few of them and they are willing to print it (not for free ofc), just need to send them stl desing.
-
@Rion-Motley what is the price on that printer ?
-
@Fred-Blais It never hurts to have a fan for increased resource use, to keep it cool and from overheating since there is no temp sensor on the Omega. Prevention is always a good idea. Plus on the marketing side, toss in some LEDs, have them programmable and it'll fly off the shelves
-
@Enrico-Bermudez This seems to be quite reputable but have not used it.
@SDuquet I like the idea of adding vents, probably underneath so you get the whole airflow stream going with the hot air rising e.t.c. Fan sounds nice as an option for those wanting it. Any suggestions on a small/cheap fan that runs on 3.3/5VDC and has leds?
@Chris-Ward the acrylic would be a nice addition to the lid so you can see inside the case. Maybe even just where the logo cut-out is? would need vents elsewhere then. Would work really well with led fans GAMER OMEGA!

@Rion-Motley re-1: I guessed as much the sheared right on a lattice, I am going to see about printing them as inserts, it may just be better to use screws but it must be possible! :feelsgood: re-2: the current box is holding together without them it may be enough to print a sort of c clamp at the sides just to keep the lid on under extreeeeeeeeeeeeeeeeeeeeeme conditions. Will post the source soon for your GID filament, just want to get it right first!
The printer is a modified BQ Prusa i3 Hephestos, there is a bit about the heat-bed upgrade I did here was like £350 in kit form and to around 24hrs from doorstep to working :neckbeard:p.s. vote :onion:
-
@Rion-Motley I took your advice and tried to make insert-able pins/clasps in v3. Have not had time to test print but .stl files are up on http://www.alswebpage.net/onion-omega-case/
If you print one please post feedback.@SDuquet, sorry! I only just noticed i forgot to add vents on the bottom!
-
Thanks, @Al , for sending me that link to https://www.3dhubs.com
Does your current design now have a vent?
-
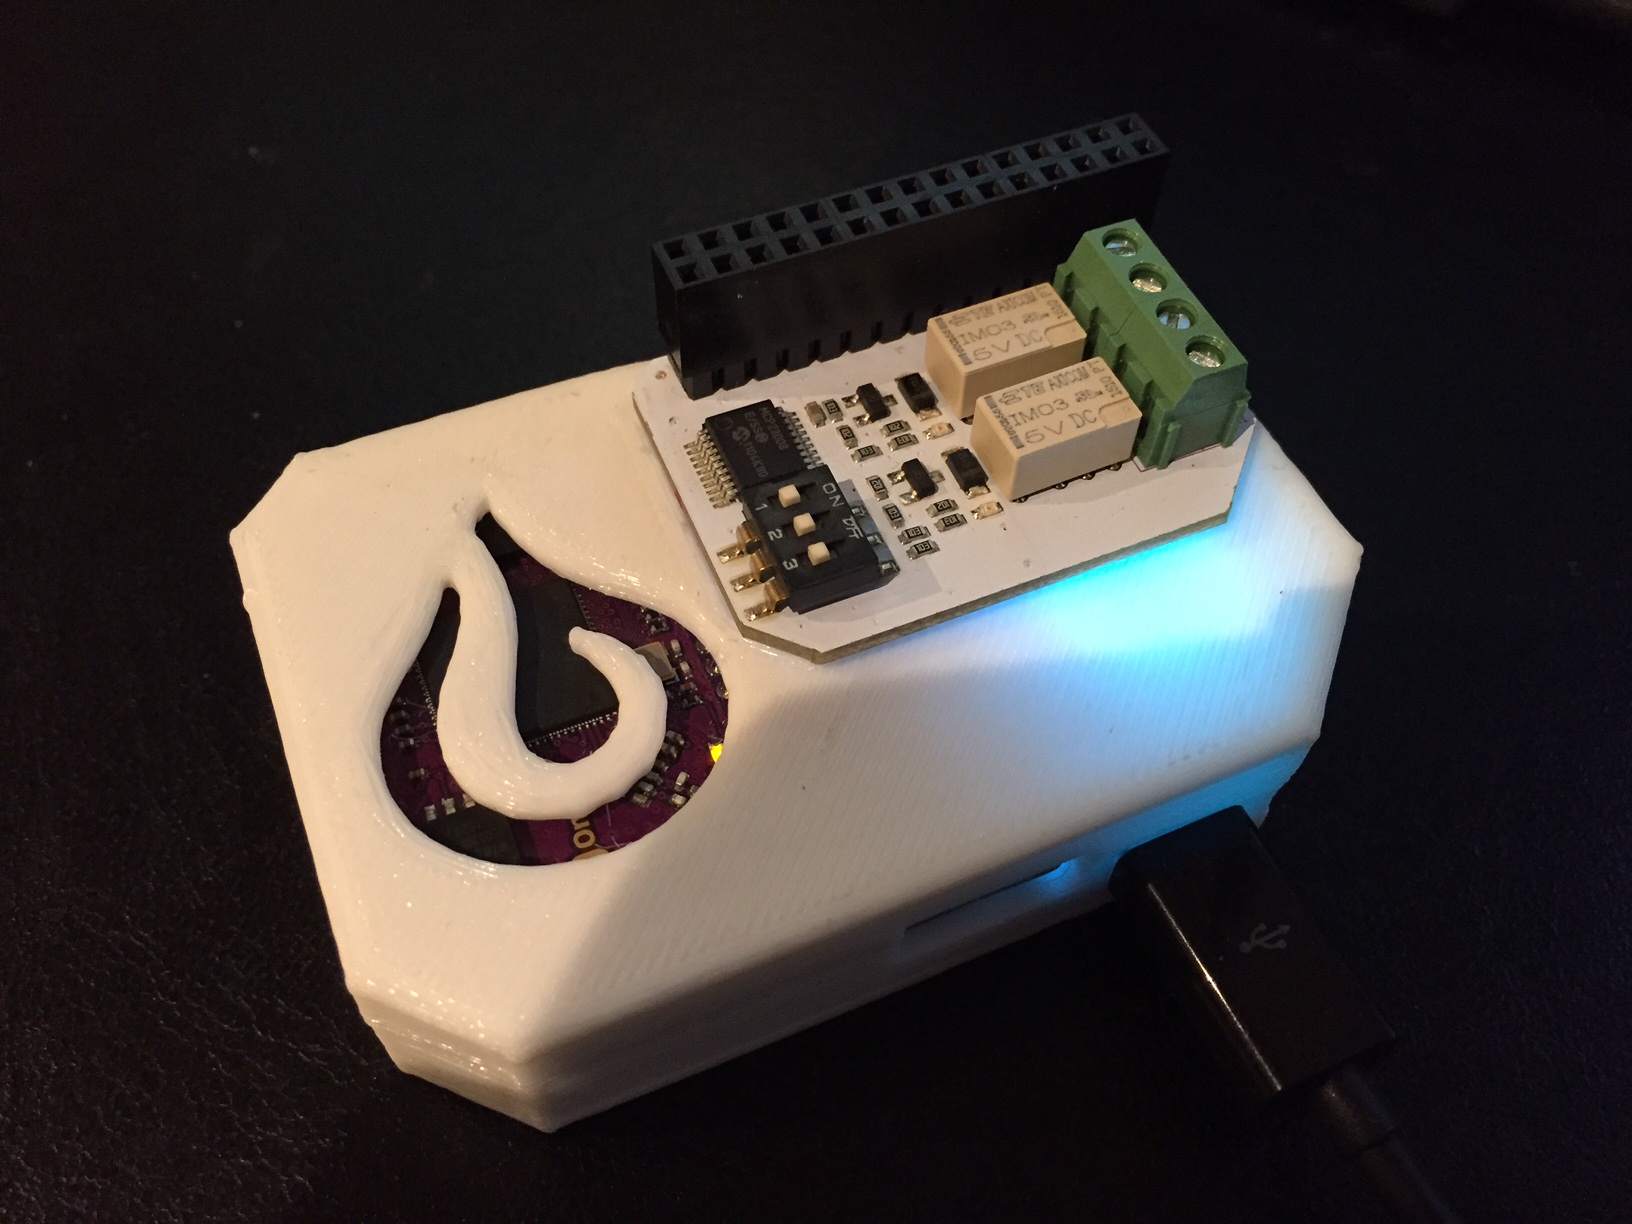
@Enrico-Bermudez no vent on the bottom yet. Just printed off v03 in whit and the results are glorious.
v04 will include a vents at the bottom of the sidesHere is the white one! LOOK AT IT GLOW
-

If you can make one for the mini dock, sign me up.
-
@Al -- very nice one in white!
-
@SDuquet, well the weekend is coming up!
-
nice! could you make a case with mini-dock?thanks!
-
Yeah, I got the mini setup as a wifi AP now, so a case will help make it nice.