Setup Netbeans 11 for C/C++ development cross compilation
-
If you like using an IDE for your C/C++ development and you'd like to use Netbeans 11 to develop your apps, the setup may not be straight forward if you've not done it before.
The first step is to make sure you have installed the Build System so you have all the required headers and libraries available. Of course if you require some non-standard LEDE libraries you may have to install them, make menuconfig can probably help you with this.
For details on how to set up the Build System for cross compilation please refer to the documentation:
https://docs.onion.io/omega2-docs/cross-compiling.html#cross-compiling
I'll assume you have installed the build system in /home/<username>/source.
Install netbeans and ensure you have enabled the C/C++ plugin, this plugin is currently not visible unless you enable the Netbeans 8.2 repository. To enable the 8.2 repostory select Tools Menu, Plugins, select the Settings tab and ensure you have checkked "Netbeans 8.2 Plugin Portal" per the image below.

You can now click on the "Available Plugins" tab, click "Check for Newest", once the update has completed you should now see the C/C++ tools are available as a plugin, select the plugin and click the "Install" button, Once the installation has completed you an close the dialog.
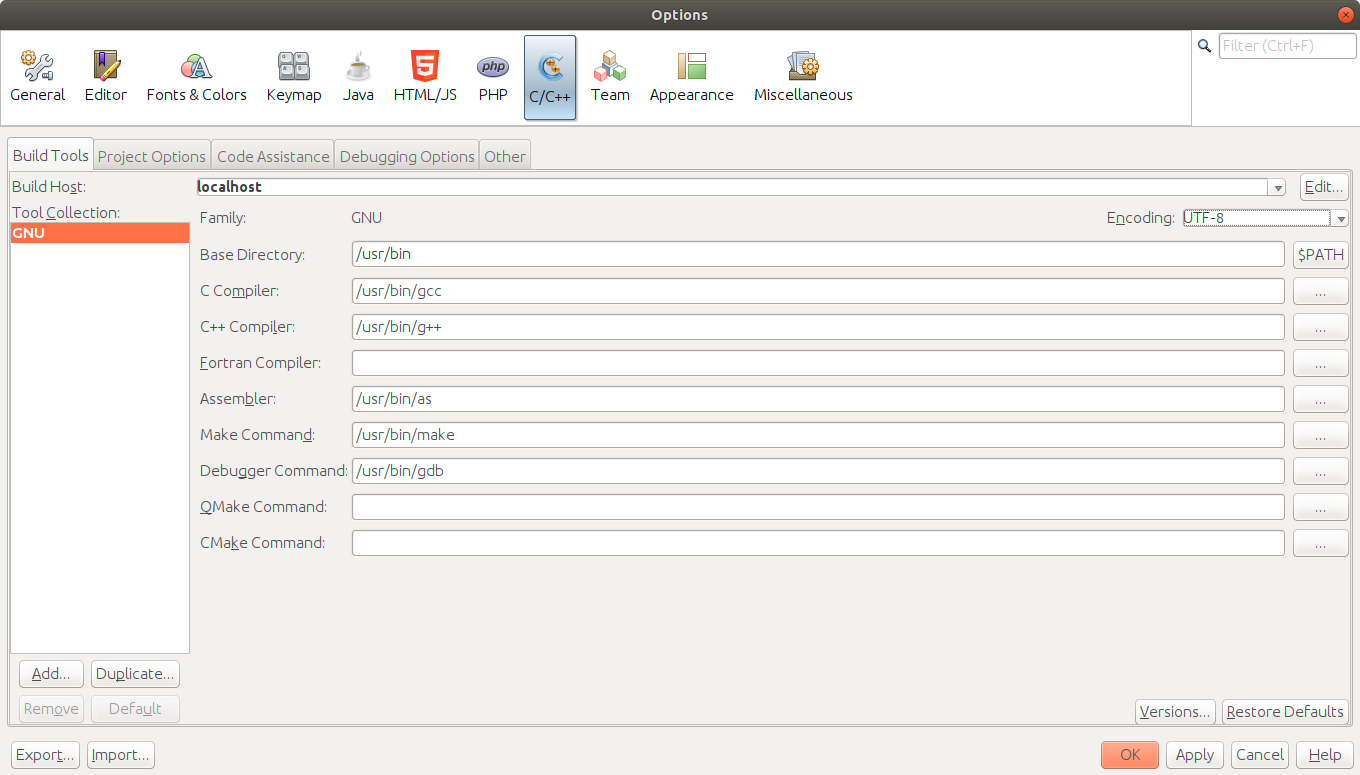
Netbeans 11 configures the standard GNU C/C++ tools which are not suitable for cross compiling for Omega, so we need to configure the GNU MIPS C/C++ toolchain.
Select the Tools, Options menu, you should now have a C/C++ option button on Setting dialog, as per the image below, which shows the standard GNU C/C++ compiler configuration.
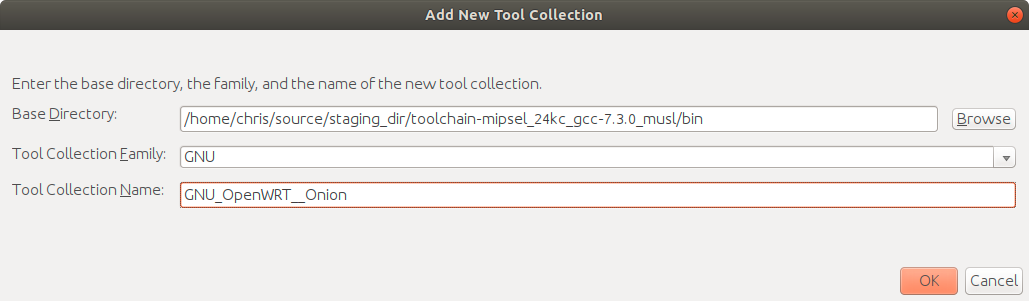
In order to add the required compiler setup, click the ADD button, a dialog will request the Base Directory, use the Browse button to select /home/<username>/source/staging_dir/toolchain-mipsel_24kc_gcc-7.3.0_musl/bin
Select "GNU" as the "Tool Family Collection" and enter a name for your setup:
Click OK and you'll then need to select the C Compiler, C++ Compiler etc, check the tool configuration matched the example below.
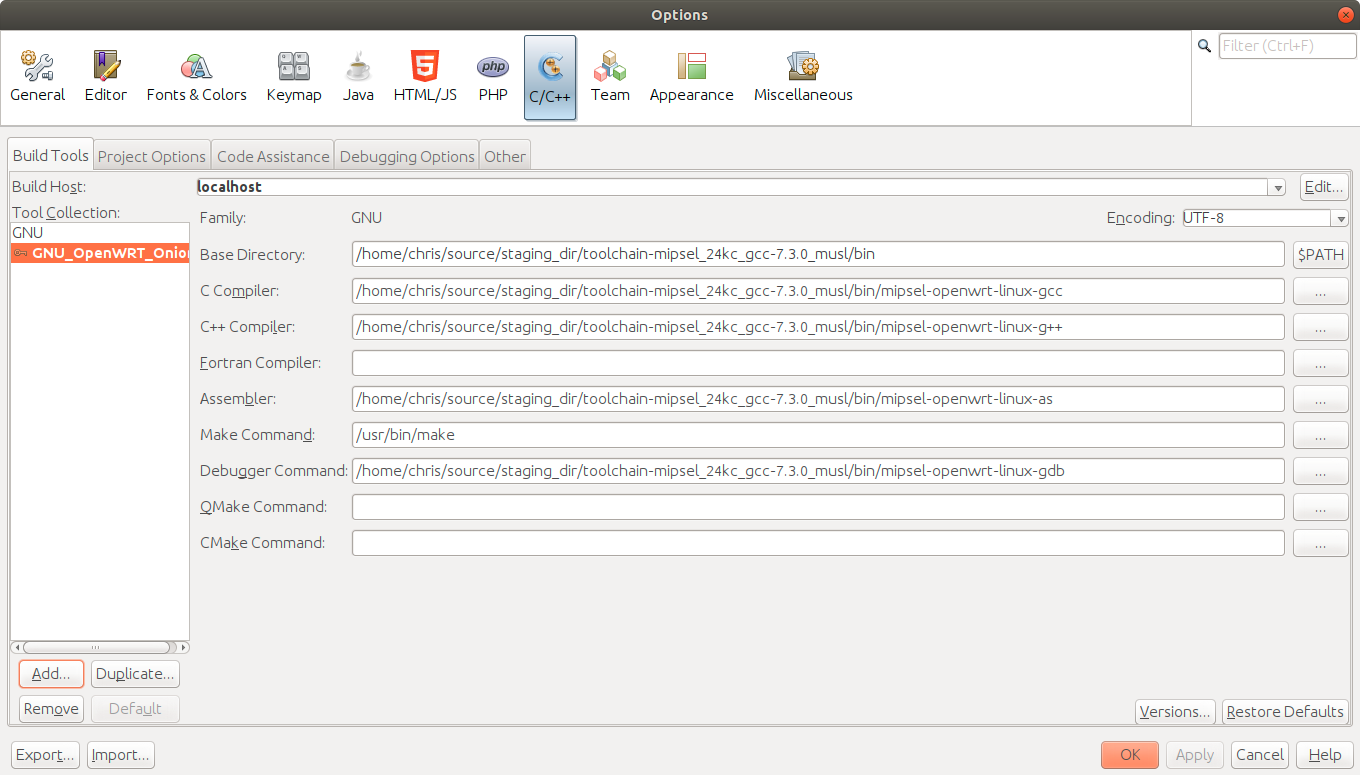
Click Apply to save the settings, them click Default button to ensure your new project will default to using your new tools set.
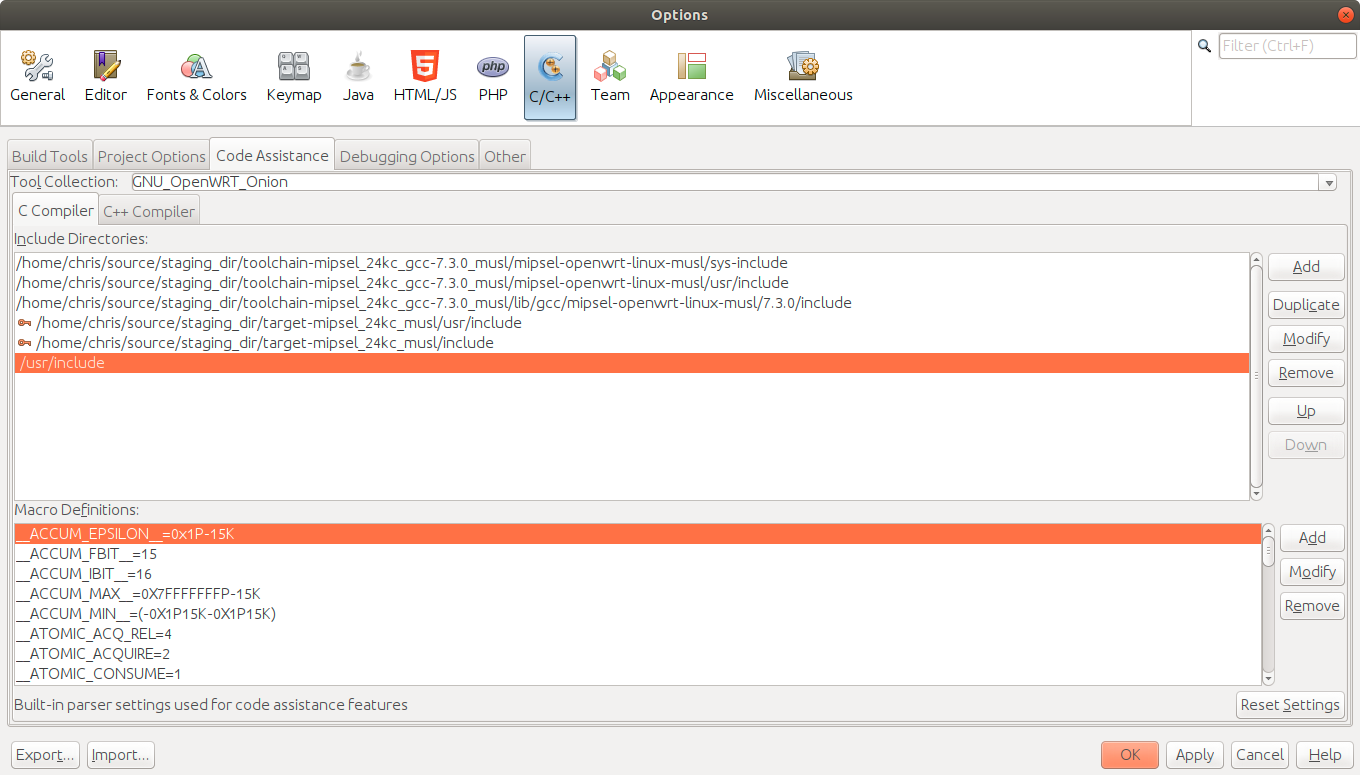
Now check the "Code Assistance" tab to ensure the system has picked up the correct include directories as below:
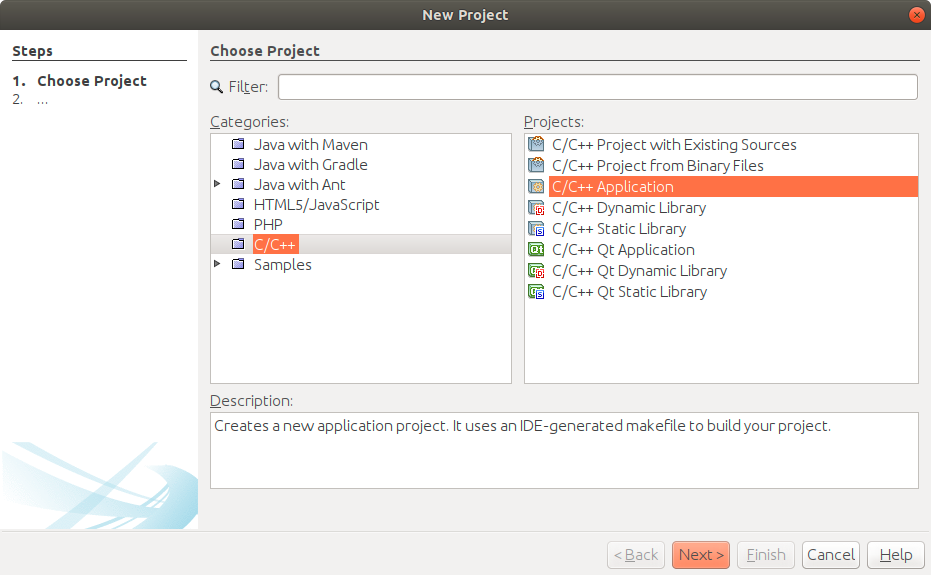
Now create your first Netbeans project, File, New Project and you will be presented with the new project dialog and which will include the C/C++ options:
Now you are good to go.
-
Excellent article.. Thank you very much crispyoz..
-
@tjoseph1 I wrote it because I messed up my Netbeans installation and had to work it out all over again. I decided to put it on here so I wouldn't lose the instructions
")