Omega2+ DS18B20 Digital temperature sensor Error
-
Hi Guys,
I am attempting to wire and get readings from the Waterproof DS18B20 Digital temperature sensor using the Omega2+.
I have followed the Onion Docs 1wire tutorial (https://docs.onion.io/omega2-docs/communicating-with-1w-devices.html) and additionally wired in a 4.7k resistor, which is required as a pullup from the DATA to VCC lines. I am using 3.3V as the tutorial says to do.
However when I enter the command
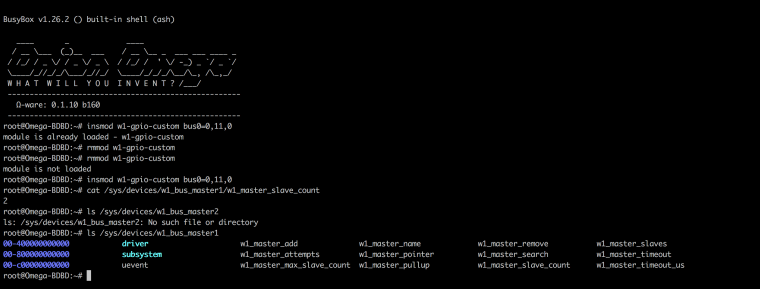
"cat /sys/devices/w1_bus_master1/w1_master_slave_count" into the terminal the output reads 2 or sometimes 3 instead of 1.
When I enter the command "ls /sys/devices/w1_bus_master1" the terminal shows numbers such as 00-800000000000 instead of the serial number.
I originally used GPIO pin 19 and have tried changing the GPIO to 1 and 11 but the same thing happened. I have also tried changing the power line to 5V instead of 3.3 but that nothing either. I had the Omega plugged into my laptop USB port and tried plugging it into an iPhone charger port put that did nothing.
I have also tested it with an oscilloscope which confirmed that since it was working and there was a straight line that the wiring is correct and it must be a problem with the code.
Any help or tips would be greatly appreciated. I am not sure where I am going wrong.
Here is a screenshot of the code:
-
@Jett-Walcott
Which dock are you using?
Do you have more than one DS18B20 to try swapping it out?
Perhaps a photo of the setup and connections will reveal something?
-
@cas
I am using the expansion dock and the setup suggested in the tutorial.
I will try rewiring it using another DS18B20 but I don't think that is the problem. It is a completely new sensor from Adafruit.
Here is a couple of photos:
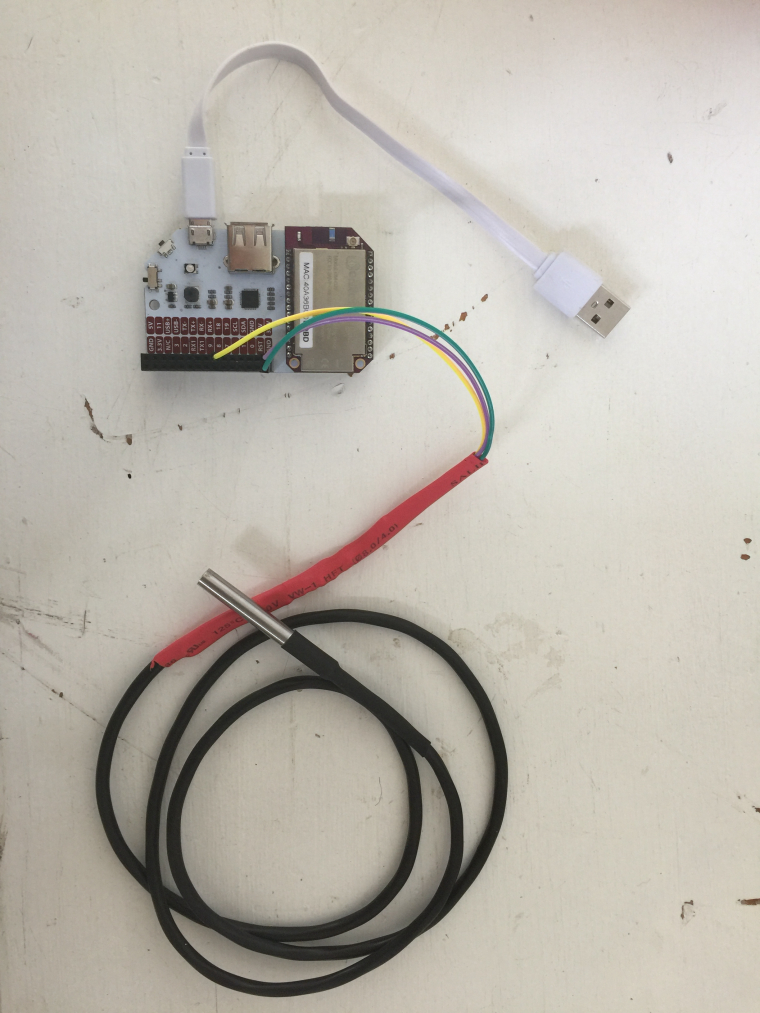
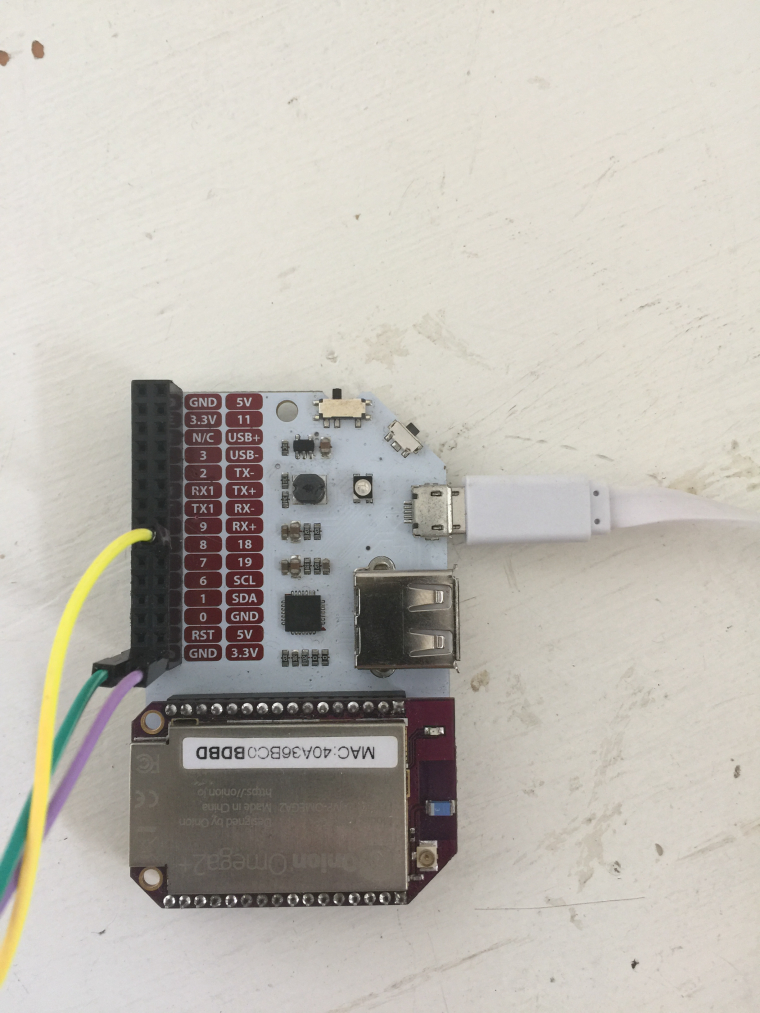
I twisted the wires together and then used a soldering iron to join them and then covered it in heat shrink.
Thanks!
-
@Jett-Walcott
Ah, ok, so presumably the resistor is somewhere under the heat shrink?
I'd suggest getting it working all out in the open on a breadboard with your spare probe.
I know the software works as I've had one running for some time,btw are you using the latest firmware (b160)?
-
From Adafruit website description, the DQ line (yellow) needs to have a 4.7K pull-up resistor connecting to the Vcc (3.3V.)
I am assuming in post #1 you did it correctly.
-
@cas
@ccs-hello
Yes, I have wired a 4.7K pull-up resistor connecting the DQ line and the Vcc (3.3V) and I am using the latest firmware.
Okay, I will try to get it working on a breadboard with the spare probe and latest firmware and see if that works.
Is it possible I am not inputting the code correctly?
Do you know if the power supply (iPhone charger or laptop) and the voltage (3.3V or 5V) has any effect on the functionality of the sensor?
-
@Jett-Walcott
Omega2 is very picky on its power supply.Also, in no time, even just for one second, apply higher voltage than 3.3V (I would pad it by 5% more) to Omega2's Vcc supply.
-
@ccs-hello
Do you know which power supply would be better for the DS18B20 sensor?
Do you mean I should never use the Omega2's 5V pin with the sensor or something else?
Thanks for your help!
-
@Jett-Walcott said:
Is it possible I am not inputting the code correctly?
Unlikely, although one error would be to specify a different GPIO pin in the command to the one to which the sensor is connected, but I doubt you'd be doing that. I suggest you stick to GPIO18 on the expansion board until you've got it working, as using that one is unlikely to cause clashes with any of the reserved ones.
Do you know if the power supply (iPhone charger or laptop) and the voltage (3.3V or 5V) has any effect on the functionality of the sensor?
I suggest using a power supply of 1A or more. The cheaper chargers (500mA) are not that great and I suppose could lead to problems such as this.
Adafruit say that the sensor is compatible with +3.0V to +5.0V, so you ought to be safe whichever Omega2 output voltage you choose (3.3V/5.0V).If I understand the context of the comment correctly, @ccs-hello is referring to input voltage to the Omega2. i.e. Don't power the Omega2 vcc directly with more than 3.3V, but since you are using a dock to power it, I doubt you will have any problem there.
-
@cas
Yes, I have made sure I am using the correct GPIO pins each time. I will use GPIO18 for my second try.
Thanks for clarifying! I will post an update when I have used the second probe and a breadboard. Hopefully it works.
-
@Jett-Walcott
On reflection, I'd suggest you stick to using 3.3V to power the sensor. Or if you power it with 5.0V, at least measure the voltage on the data pin before connecting it to your dock, just in case.At least until someone with more hardware experience chimes in....Of course it's going to be 5V at the data pin, if you power it with 5V and don't adjust the voltage with a voltage divider like a regulator, it's a 5V circuit. Doh!
-
@cas said:
Adafruit say that the sensor is compatible with +3.0V to +5.0V, so you ought to be safe whichever Omega2 output voltage you choose (3.3V/5.0V).
Ok, I wasn't thinking clearly when writing this, so while true from the perspective of the sensor, it's bad advice from the perspective of the Omega2.
What I should have said is that the sensor can be safely powered by either voltage, but use the 3.3V on the Omega2.I think I need to take a time out from giving advice here. I'm not thinking clearly.

-
@cas
That's all good! Thanks for letting me know.
I will make sure to use the 3.3V pin on the Omega2 just in case.
I am wiring it up tonight.
-
@cas
@ccs-hello
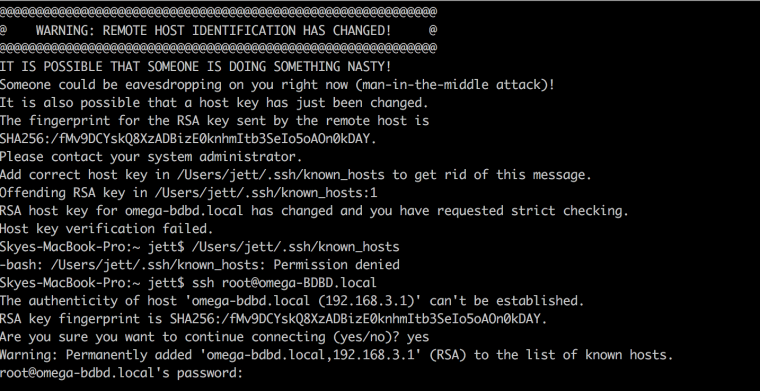
I wired the new sensor to a breadboard last night with the 4.7K resistor between Data and VCC lines. At first it didn't work but after doing a factory reset of the Omega and and going to /Users/jett/.ssh/known_hosts (through Go To File in Finder) and deleting all the text there I put in the commands again and it worked! I then added the second temperature sensor into the circuit and they both work at the same time.
Here is the photos of the code process:
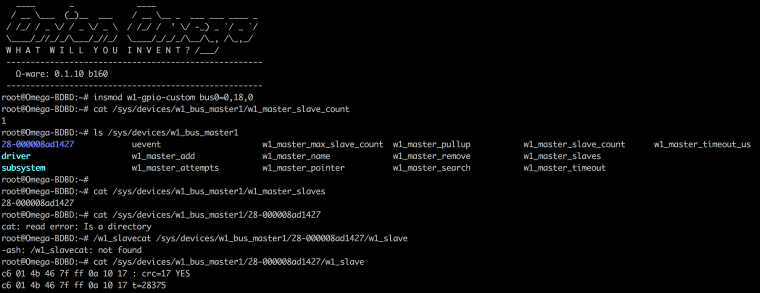
Here is a few photos of the end result:
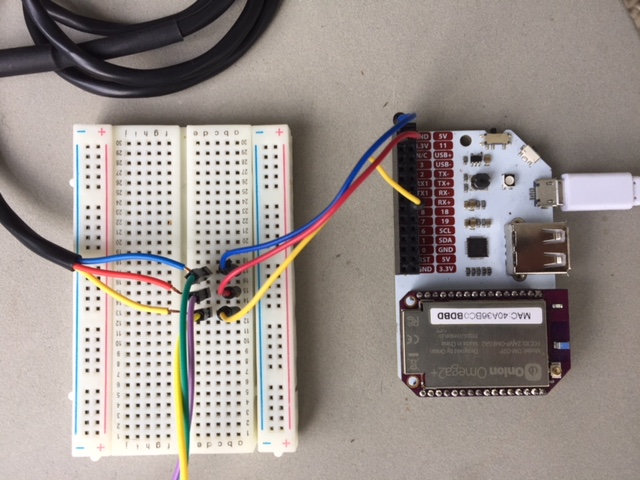
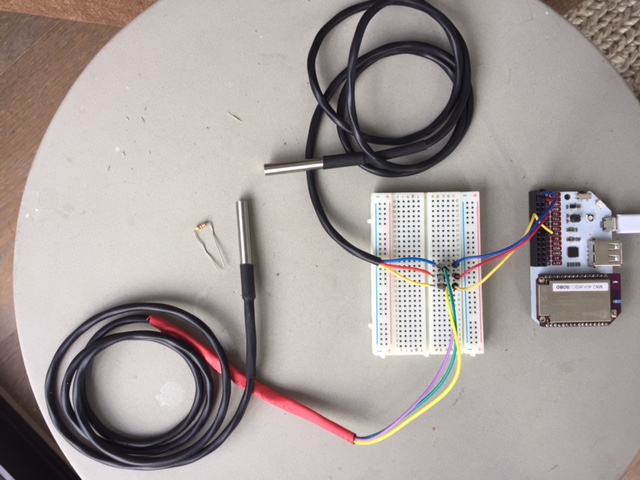
I don't know what happened with the host identification at the end there. I wonder if that was part of the problem in the beginning. Also since I had the 4.7K resistor under the heatshrink I realised I didn't need another one on the breadboard.
Anyway thanks for your help guys! Now it's time to try and get the temperature readings showing up on Blynk and Amazon AWS!
-
@Jett-Walcott
Good progress. Congrats.
If both 1-wire sensors sharing the same input line, then only one 4.7K pull-up resistor is needed.
-
@ccs-hello
Thanks!