Driver for 1-Wire sensor bus
-
Hi for example I've this:
root@Omega-276D:/etc/modules.d# ls gpio
30-gpio-button-hotplug 58-i2c-gpio-custom spi-gpio
30-gpio-irq 59-i2c-gpio w1-master-gpio
50-ledtrig-gpio 60-leds-gpioWhich one should I use ?
Thanks,
Miguel
-
@Miguel-Peredo it looks like @Omega303 is still in the process of putting together a guide
")
What @Omega303 mentioned above is you do following steps to get the 1 wire running:
-
Upgrade your firmwire to the latest (via the gui under settings is easiest)
touch /etc/modules.d/55-w1-gpio-custom
vi /etc/modules.d/55-w1-gpio-customThen add this one line (replace 19 with the pin # you want to use):
w1-gpio-custom bus0=0,19,0- Restart your onion. Then you should see contents in /sys/devices/w1_bus_master1/* now ... if your device is plugged in then there should be a file reading /sys/devices/w1_bus_master1/28-DEVICEID/w1_slave (28-DEVICEID where * is the id of your device)
I'm currently not getting a read from #3 - so that's where I'm stumped (any advice with the comments above?)
 but at least I know w1 is running.
-
-
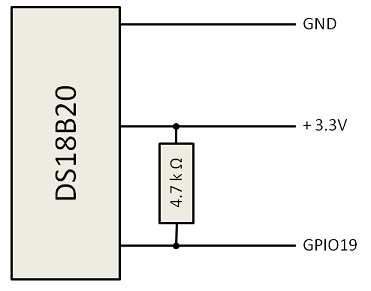
@Nathan-Bertram Although I found a DS18B20 spec telling the sensor can be driven from 3.0 to 5.5 Volts, I recommend the 3.3 V instead of 5V. But more important is to insert a 4.7 kOhm resistor between data pin and GPIO. I think the missing resistor disables proper communication. The sensor id needs to remain the same - it is the hardware address for the 1-wire master to request data. Here is how I connected the sensor:
-
@Omega303 ah... I tried hooking up a a 4.7k resistor last night but obviously read the diagram incorrectly: http://monosnap.com/image/ideZC9zI136vSFrAo9LC2747TTcqio not sure what i was thinking LOL -- I'll try again tonight and let you know how it goes. Thank you!
-
Hi,
The electronics (diagram) in my case is OK. The issue is that I do not have /etc/modules.d/55 p.....I have listed in a previous post all modules I have with gpio.
Any suggestions ?
Thx,
-
@Miguel-Corteguera you'll need to create the file (touch) then insert the line with the correct pin # as instructed above
-
@Nathan-Bertram Hi, thanks for the tip. Created the file, restarted the Onion, folder /etc/devices/w1_master_driver now exists, but nothing with DEVICE to be found there.
Any ideas ?
-
Now it's working, using +5V and GND and PIN 26. Before I was using + 3.3V. My sensor is a 18B20 with 10K resistor.
-
This is how it looks:

root@Omega-276D:/sys/devices/w1_bus_master1/28-0415a810c3ff# cat w1_slave
7b 01 4b 46 7f ff 0c 10 af : crc=af YES
7b 01 4b 46 7f ff 0c 10 af t=23687
-
A big thank you to @Omega303, his awesome 1-Wire tutorial is now up on the Onion Wiki: https://wiki.onion.io/Tutorials/Reading-1Wire-Sensor-Data
-
SUCCESS - thanks @Omega303 guide looks awesome - finally got it to work after hooking up my resistor correctly this time (using the 5v power source though -- I changed my pin # to 19 instead of 0 and it worked):
awk -F= '/t=/ {printf "%.03f\n", $2/1000}' /sys/devices/w1_bus_master1/28-0215718f9dff/w1_slave
21.500Yeah!
-
Using firmware 0.0.6 b275, the temperature DS18B20 works using a 3.3V connection with a 4.7K pull-up resistor on the Data out line. A DS18B20 PAR (PARASITIC version) also works. I connected it using GPIO 26 and I have an OLED to display the time and temperature using some python code.
Ian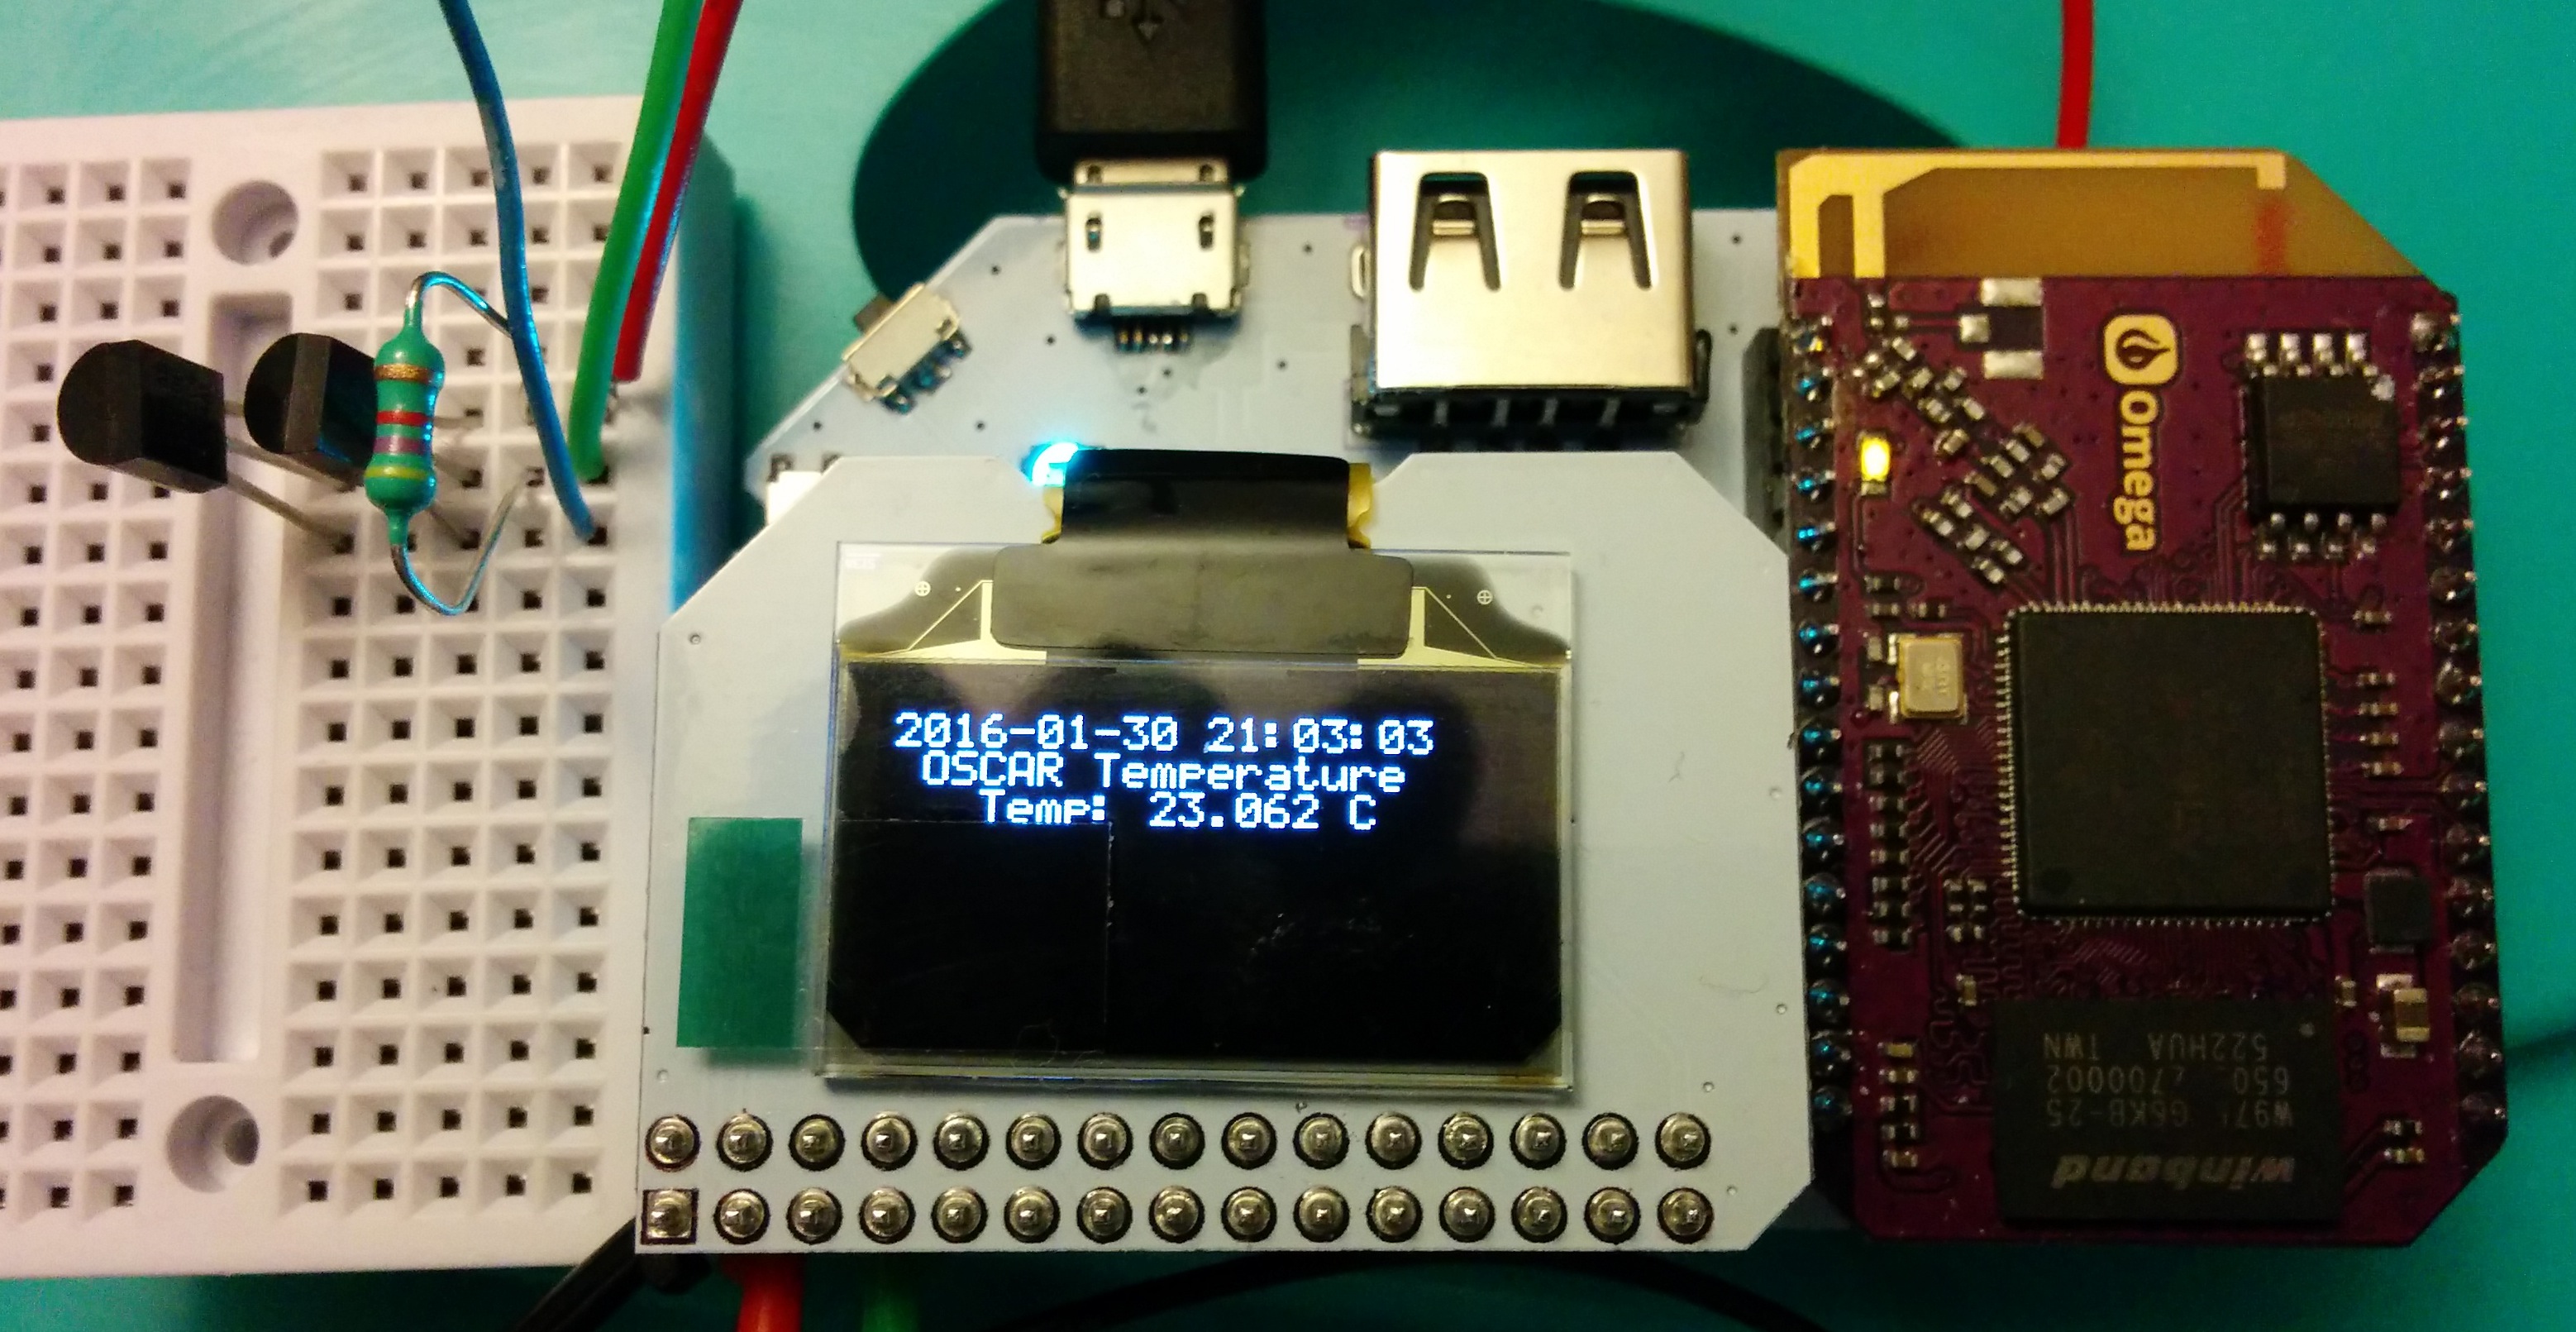
-
I finally got a chance to try the tutorial, and it worked right away! Thanks Omega303!
-
@Ian-Pun Would you be interested in sharing your python code? I am just gettng started with python and have no clue where to start.
Thank you in advance.Dan
-
The code in python for the temperature. I adapted from a Raspberry Pi code.
Ian
-
@Ian-Pun
That is a great example to work from. Thank you.
Only problem I have now is trying to convert the temp into F.
I have tried adding the calculations in everywhere I can think of and I just get errors.
Any help would be great. I am real new to python programing.Thanks again.
Dan